前面3台esxi 6(host)安裝好了之後
他就像一台台的主機
在此之前
我們先來定義一下常用的名詞
避免未來混淆
host = 實體機 包含 esxi
單 esxi = esxi
有vCenter納管的esxi環境 = vSphere
在雲端基礎架構裡面infrastructure
esxi是最最基礎的角色
假設...
你有一台 esxi
那麼,你可以透過3種方式連進去
1.SSH
2.vSphere Client
3.esxi Web UI (前面VM_Lab05已經有教過囉)
一、連入esxi,使用 vSphere Client
二、連入esxi,使用SSH
一、連入esxi,使用 vSphere Client
01-01.下載vSphere Client
因為esxi是6.0的版本
所以vSphere Client也需要是v6的版本才行
VMware 早期有很多版本都沒有切齊
未來...
陸陸續續會開始切齊版本,避免一些相容性上的困擾
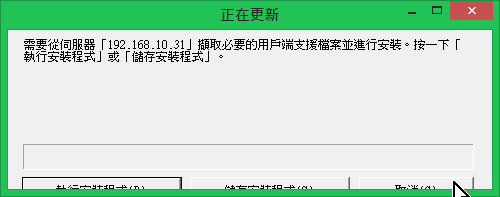
下圖
是用vSphere Client 6.0 去連 vCenter 5.5
會出現要你安裝正確的 vSphere Client 版本
否則會連不過去

這邊...
要注意一下
因為我的Lab環境有 vSphere 5.5也有 vSphere 6 同時在運作
而vSphere Client 6 無法向下相容 5.5
(上VCP課的時候,記得老師說可以,但實測是不行)
且vSphere Client 5.5 無法向上相容 6
所以變成...
我在主戰機上安裝 5.5 和 6 的vSphere Client
只要安裝路徑改一下
就可以一台主戰機安裝2套不同版本的vSphere Client
當要開啟 6 的環境時,就用vSphere Client 6去開
當要開啟 5.5 的環境時,就用vSphere Client 5.5去開
官方下載網址:(無需註冊會員,可以直接下載使用)
https://kb.vmware.com/selfservice/microsites/search.do?language=en_US&cmd=displayKC&externalId=2089791
別下載錯囉~
請下載最新版本6.0U2

下載完成後,執行他

01-02.安裝vSphere Client
接下來...
不截圖了,就是無腦安裝一路Next下去
就安裝好了~

01-03.連入esxi
執行剛剛安裝好的
IP: 192.168.10.28
帳號: root
密碼:

略過

這樣就OK了

其他2台,也是比照辦理
試著透過vSphere Client
登入看看
192.168.10.29
192.168.10.30
01-04.變更語系
VMware有很多雷區
不小心就會踩到
大部分跳出的Error Message
如果用的是繁體版的 vSphere Client
就會跳出繁體版的錯誤訊息,可是很難解讀到底發生什麼問題
這時候
就可以切回英文版的 vSphere Client
開的捷徑,再在後面加上個參數...>>-locale en_US
就可以了

我有2個版本的環境
所以就會變成這樣...

二、連入esxi,使用SSH
02-01.下載putty
二、連入esxi,使用SSH
一、連入esxi,使用 vSphere Client
01-01.下載vSphere Client
因為esxi是6.0的版本
所以vSphere Client也需要是v6的版本才行
VMware 早期有很多版本都沒有切齊
未來...
陸陸續續會開始切齊版本,避免一些相容性上的困擾
下圖
是用vSphere Client 6.0 去連 vCenter 5.5
會出現要你安裝正確的 vSphere Client 版本
否則會連不過去
這邊...
要注意一下
因為我的Lab環境有 vSphere 5.5也有 vSphere 6 同時在運作
而vSphere Client 6 無法向下相容 5.5
(上VCP課的時候,記得老師說可以,但實測是不行)
且vSphere Client 5.5 無法向上相容 6
所以變成...
我在主戰機上安裝 5.5 和 6 的vSphere Client
只要安裝路徑改一下
就可以一台主戰機安裝2套不同版本的vSphere Client
當要開啟 6 的環境時,就用vSphere Client 6去開
當要開啟 5.5 的環境時,就用vSphere Client 5.5去開
官方下載網址:(無需註冊會員,可以直接下載使用)
https://kb.vmware.com/selfservice/microsites/search.do?language=en_US&cmd=displayKC&externalId=2089791
別下載錯囉~
請下載最新版本6.0U2

下載完成後,執行他
01-02.安裝vSphere Client
接下來...
不截圖了,就是無腦安裝一路Next下去
就安裝好了~

01-03.連入esxi
執行剛剛安裝好的
IP: 192.168.10.28
帳號: root
密碼:

略過

這樣就OK了

其他2台,也是比照辦理
試著透過vSphere Client
登入看看
192.168.10.29
192.168.10.30
01-04.變更語系
VMware有很多雷區
不小心就會踩到
大部分跳出的Error Message
如果用的是繁體版的 vSphere Client
就會跳出繁體版的錯誤訊息,可是很難解讀到底發生什麼問題
這時候
就可以切回英文版的 vSphere Client
開的捷徑,再在後面加上個參數...>>-locale en_US
就可以了

我有2個版本的環境
所以就會變成這樣...

二、連入esxi,使用SSH
02-01.下載putty
大家應該不陌生
請直接至Putty官網下載,即可使用
別選錯了
http://www.chiark.greenend.org.uk/~sgtatham/putty/download.html

02-02.開啟SSH
想要透過SSH連入esxi
事先還必須開啟SSH 的動作才行
先使用vSphere Client 先登入 192.168.10.28 這台 esxi

組態 > 軟體 > 安全性設定檔 > 內容

基於安全考量
預設是不啟用的
按下 選項

隨主機一起啟動和停止:
esxi開機就會自動帶起這個SSH服務
手動啟動和停止
在esxi 重開機後,每次要連入都要來到這邊啟動才行
一般來說
企業中都是選擇 手動啟動和停止

馬上就帶起SSH服務了

02-03.連入esxi
執行putty
連入192.168.10.28這台esxi

同意
按 是

輸入帳號密碼
帳號是root
密碼是...

到這邊,我們完成了
1.使用 vSphere Client 連入 esxi
2.使用 SSH 連入 esxi
沒有留言:
張貼留言